Sunday, November 12, 2006

The Goodbye Girl


This will not be unexpected news to anyone, but unfortunately, I am finally going to bid my farewells to the blogosphere. I have become increasingly involved with volunteer work for my church and its academy. It has basically become a full-time endeavor, leaving me little time for blogging. I had hoped to be able to find a balance between the dual pursuits, but as I tend to do things in an all-or-nothing manner, this simply cannot be.
I apologize for this seeming careless abandonment of my blog, but this is what I must do. I have and willcontinue to truly miss you all.

Thoughts and prayers (with coffee),
Julie

Sunday, October 1, 2006

This is not goodbye...


Because my volunteer work has very nearly become a full time endeavor, and also because I will be out of town for part of November and all of December, I am suspending The Suburban Apron Company (at least temporarily). Sporadic entries and/or entries without 100% dedication are unfair to everyone involved, therefore, suspending this blog is the only fair and reasonable option to consider.

You've all been great and I hope to be back sooner, rather than later. Thanks for everything!

Until we meet again for coffee,
Julie

Wednesday, September 13, 2006

Prayer and Farming in the Kitchen


Another week has passed without any particularly extraordinary or significant personal contribution to the various causes of the world. I realize that a certain patience is required; that I cannot individually change the present condition of humanity. Instead, I must do what I can, when I can. By starting small and starting local, I can offer personal aid and assistance, little by little, to those around me. And so, today's prayer is for serenity, courage, and wisdom:

"God, grant me the serenity to accept the things I cannot change; the courage to change the things I can; and the wisdom to know the difference." ~Reinhold Niebuhr

Still, in a place far, far away from Illinois, somewhere close to the equator, there is a small family-owned cocoa farm, where the harvest remains shade grown and its crop is used to make rich, delicious chocolate bars. Shade grown farms promote a harmonious balance within the sustainable forest environment, where plants and animals indigenous to this natural habitat remain supported and protected. Despite the trend toward mass production of cocoa beans in larger, open sun grown farms, there are some smaller farms that still practice shade grown cocoa harvesting. Endangered Species Chocolate concerns itself with organic, fair traded products, supporting global efforts to ensure environmental protection, enable sustainable natural habitats, and empower the farming populations of these habitats. And somewhere else far, far away, on another small self-sufficient farm, fair wages are being paid for a modest coffee bean harvest, because of the efforts of Seattle's Best Coffee.

Having chocolate and coffee, I decided to bake. To bake and offer help globally, in a very, very, 
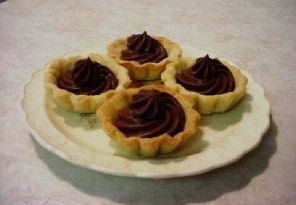
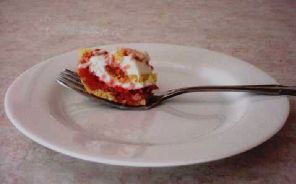
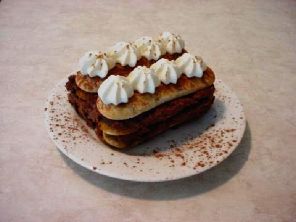
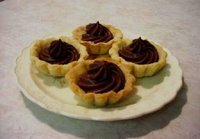
very small way, by incorporating ingredients which support the labors of small, self-reliant family owned farms and promote fair wages paid, in places far, far away from Illinois. And so I baked a batch of mocha tartlets, using an Endangered Species Dark Chocolate Bar with Espresso Beans. This chocolate is especially rich and creamy, making the tartlets that much more delicious than ordinary baking chocolate. And instead of using the liqueur included in the recipe ingredients, I chose to use Seattle's Best Fair-Trade Certified Organic French Roast. Since the chocolate bar already contained espresso beans, this rich coffee was the perfect complement and worked beautifully for these tartlets.

More small steps...

MOCHA TARTLETS
(recipe courtesy www.epicurious.com)

Ingredients:
For mocha custard:
2 large egg yolks
2 1/2 tablespoons sugar
1 1/2 tablespoons cornstarch
3/4 cup whole milk
2 oz fine-quality bittersweet chocolate (not unsweetened), finely chopped
1/2 tablespoon Tía Maria or other coffee liqueur
(I used brewed Seattle's Best Fair Trade Organic French Roast Coffee, instead of a liqueur)
1/2 tablespoon unsalted butter, softened
1 teaspoon instant-espresso powder
(omitted since chocolate bar was heavy with espresso beans)

For butter cookie dough:
1 1/4 cups all-purpose flour
1/3 cup sugar
1/2 teaspoon salt
1 stick (1/2 cup) unsalted butter, softened
1 large egg, lightly beaten
1/2 teaspoon vanilla

Make custard: Beat together yolks, sugar, cornstarch, and a pinch of salt in a bowl with an electric mixer until thick and pale, about 1 minute. Heat milk in a 2-quart heavy saucepan over moderate heat until hot but not boiling. Add one third of hot milk to yolk mixture in a slow stream, whisking constantly. Pour remainder of milk into yolk mixture, whisking, then transfer to saucepan. Simmer, whisking constantly, until very thick, 1 1/2 to 2 minutes. Remove from heat and add chocolate, liqueur, butter, and espresso powder. Let stand until chocolate is melted, about 1 minute, then whisk until smooth. Force custard through a fine sieve into a bowl. Cover surface of custard with wax paper and chill until cold, at least 4 hours.
Make tartlet shells while custard chills: Pulse together flour, sugar, salt, butter, egg, and vanilla in a food processor until dough is smooth and begins to form a ball (it will be soft, like cookie dough). Turn out dough onto a sheet of plastic wrap and gather into a ball. Flatten dough into a disk and chill, wrapped in plastic wrap, until firm, at least 30 minutes and up to 8 hours (overnight).
Preheat oven to 350°F.
Break off 1-teaspoon pieces of dough and press evenly into molds with floured fingers to form shells about 1/16 inch thick, pinching off excess from rim and making bottoms slightly thinner than sides. Arrange molds 1 inch apart in a shallow baking pan and chill until dough is firm again, about 30 minutes.
Bake in middle of oven, rotating pan halfway through baking, until pale golden, 12 to 15 minutes total. Transfer molds to a rack to cool, then carefully remove shells from molds. Make more tartlet shells in same manner if desired.
Assemble tartlets: Fill pastry bag with custard and pipe decoratively into shells. Makes 24 tartlets.

Until we meet for coffee,
Julie

Tuesday, September 5, 2006

"A journey of a thousand miles begins with a single step." ~Lao-tzu


In the previous post, I wrote about offering assistance to others in need. "To simply help." Somewhat overwhelmed by so much need, I wasn't quite sure where or even how to begin offering my particular personal assistance. And so, I've continued doing volunteer service work for my local church and its academy library. My physical contributions of service have not yet progressed to broader aid, as I've not yet swung a hammer forHabitat for Humanity or ladled soup at a Salvation Army shelter. Still, in the spirit of simply helping, I stopped and bought some apples at a local farmer's market this weekend. Although it wasn't an extraordinarily significant step in culinary activism, it was my first step. First small steps on a personal culinary journey toward a greater social responsibility. And while national and global agencies remain farther along the journey, at least my single farmer's market purchase helped, however minimally, to support a local farmer and strengthen the economy of local agriculture.

So I bought some apples. And using a simple recipe from Local Flavors: Cooking and Eating from America's Farmers' Markets (Deborah Madison), I chose to bake a Caramelized Apple Tart with Cinnamon Custard. Rustic comfort food for these first days of early Fall, as I take first steps on a more purposeful journey.
Caramelized Apple Tart with Cinnamon Custard
(recipe courtesy Local Flavors: Cooking and Eating From America's Farmers' Markets, from Deborah Madison)

Ingredients:

For the Apples:
3 apples (mine were smaller, so I used 4)
2 tablespoons unsalted butter
2 tablespoons sugar

For the Batter:
1/2 cup (1 stick) unsalted butter at room temperature, plus extra
1/2 cup sugar
3 medium eggs, at room temperature
1 teaspoon vanilla extract
pinch salt
1 cup all-purpose flour

For the cream:
1/2 cup crème fraîche or heavy cream
1 teaspoon ground cinnamon
1 egg yolk
Confectioners' sugar (for dusting)


Preheat the oven to 375°F. Butter a 9-inch tart pan. Peel and core the apples, then slice them into 1/2-inch wedges. Melt the butter in a wide nonstick skillet, add the apples, and sprinkle them with the sugar. Cook over high heat, occasionally flipping the apples, until they start to caramelize, then reduce the heat to medium. Keep a close eye on the apples, turning them frequently so they don't burn. This will take about 15 minutes in all. Turn off the heat.

To make the batter, cream the butter and sugar in a mixer with the paddle attachment until light and fluffy. Add the eggs one at a time, beating until each is incorporated before adding the next. Add the vanilla and salt, then stir in the flour. Smooth the batter into the tart pan with an offset spatula, pushing it up the sides to make a rim. Lay the apples over the batter.

Mix the ingredients for the cream together, then pour it over the apples. Set the tart on a sheet pan and bake until the crust is golden and starting to pull away from the sides, about 35 minutes. Let cool for at least 20 minutes before serving. Remove the tart from the rim, place it on a serving plate, and sprinkle with confectioners' sugar. (When making this tart, my fresh-from-the-farm-small-apples seemed too fragile for pan caramelization, so instead, I simply coated them first with the custard mixture and second with a layer of sugar before baking.)

Until we meet for coffee,
Julie

Wednesday, August 30, 2006

Prayers for Anderson Cooper

It all began with Oprah Winfrey. First, however, I must admit to not being a historic fan of her television show, but I am an insomniac and her show re-airs latenights, here where I live, and there has been more than one occasion where I've found myself switching channels and pausing on her show. Recently, I've noticed the show has become more socially responsible, with topics that are actually relevant and considerable. Perhaps the Oprahshow has always been devoted to public service, with myself unaware? In my defense, whenever I had seen the show in times past, episode subjects were generally fashion trends, makeover shows, or celebrity interviews. But again, lately I've notice a trend towards episodes that matter and so, I can no longer absolutely declare myself, 'not a fan' of the show.

With that said, let me start over. It all began with Oprah. And insomnia. It began with another one of my many late nights, incessantly channel switching. On this night, when I switched past Oprah, I quickly switched back to make sure I saw what I thought I had seen: Anderson Cooper. Anderson Cooper on Oprah? Anderson Cooper onOprah! Considering Anderson Cooper is a journalist whom I greatly respect and admire, I was both immediately surprised and extremely pleased. Dispatches from the Edge: A Memoir of War, Disasters, and Survival had just been released and Anderson was on the show to discuss the powerful book with Oprah Winfrey. His mother, designer Gloria Vanderbilt, was also on the show to lend support and briefly discuss a terribly tragic family event that is embedded within Anderson's deeply personal story, which underscores the overall theme of the book.

Like so many others, I also identified with Anderson's personal losses. Myself having been on a sort of auto-pilot-course since last spring, when my father died following a brief, unexpected illness, I was only partially coherent during 2005 and for much of this year as well. Dispatches from the Edge: A Memoir of War, Disasters, and Survival reminded me of how universally tragic the year 2005 really was and how geographically far reaching suffering and loss really is. Human suffering is global: while there are obvious measures, not a single human has ever, nor will ever escape a personal time of suffering. Pain is ubiquitous.

Having been abruptly reawakened from my adopted routine of mechanical-sleepwalk, my own personal coping defensive, by this powerful book, I, like so many others, felt immense sadness, a certain guilt, and an overwhelming sense of helplessness for those thousands and thousands victims of war, natural disaster, and unfortunate circumstance, as I read page after page of such painful suffering and struggle (the struggle often concluding in vain). I also shared the heavy grief, anger, and urgency that Anderson carried through these pages. And so, I despaired and my despair resulted in an identity crisis of sorts for The Suburban Apron Company.

This identity crisis has resulted in less frequent posts and an unclear sense of direction. While I have no plans to suspend The Suburban Apron Company, I do plan to alter my posts to reflect a more socially responsible blog. However, I am not changing the blog's theme; it will continue as a food blog. I apologize for any seeming alienation of my readers--it is not intentional. I simply need to find a courageous voice to pursue more purposeful writing. I need to make a difference, no matter how insignificant. I also apologize if this seems somewhat narcissistic--again, it is not intentional. After reading Anderson Cooper's sincerely honest memoir, I can no longer personally justify the irrelevance of writing solely about cooking and baking, without meaningful contribution. I can't seem to justify so much writing about savory dishes and comfort food, when war, famine, tsunamis, and hurricanes have destroyed so incredibly many lives. Human destruction, whether manmade or natural disaster, is still life destroyed. I can't seem to defend so much time spent writing about decadent desserts, when there are so incredibly many people dying horrifically slow, tortured deaths due to starvation and disease. I cannot defend a primary activity of leisurely writing about cooking and baking, when so incredibly many people are without basic amenities, including shelter, hot or cold running water, clothes, or in some cases, life itself.

What is going to be the revised, relevant direction of this food blog? I'm not sure. I simply plan to continue cooking, baking, and writing about food, in a manner that will lend some support to readers seeking to nourish body and soul. Perhaps writing about comfort food can be made relevant, by providing brief distraction from the heavy weight of incessant, current news events. Again, I'm not sure.

And so, I will simply cook, bake, volunteer, and pray. Prayers for guidance to be of help and for graceful mercy to be shown toward those in need. And prayers for Anderson Cooper, who has undoubtedly influenced many more than just myself to awaken from their protective, yet vacant, mechanical motion and actively seek ways, however small, to offer help. To simply help.

Until we meet for coffee,
Julie

Wednesday, August 23, 2006

Healthier Apron Strings


Admittedly, my recent activity on The Suburban Apron Company has been less than frequent. For this, I apologize. I have been extremely busy with several other projects, commanding complete personal commitment. However active in these varied pursuits, I have not forgotten The Suburban Apron Company; on the contrary, I've been giving this site much thought, regarding both its content and readers.

Inspired by my recent interviews with The Hippy Gourmet and Christina Pirello, I have been seriously considering incorporating healthier baking and cooking into recipes featured on this site. While I do not have any intentions of transforming this site into a health-foods forum, I do intend to complement my usual heavy cream and sugar-laden posts with those containing recipes that are more nutritious. I am not abandoning my lovely sweet and savory dishes; I simply plan to include some additional recipes that are rich and delicious, while remaining healthy.

Hopefully, these healthier choices will be as eagerly accepted as all of my previous recipes have been for The Suburban Apron Company.

Until we meet for coffee,
Julie

Friday, August 18, 2006

Extraordinary Chocolate Cake for an Ordinary Friday Morning


I must confess to eating chocolate cake for breakfast, again, but in my defense, this cake is so irresistible and rich, it is too good not to eat for breakfast. I didn't take a photo because I didn't have the properly molded specialty pan, so my version of this cake is not nearly as gorgeous as the photo shown with the recipe in Paris Boulangerie Pâtisserie. Since mine still tastes as beautiful as that gorgeous, glossy photo, I have to share the recipe.

Le Pleyel

Ingredients:
6 ounces/180 grams best-quality semisweet
or bittersweet chocolate, chopped
1/2 cup (1 stick) plus 2 tablespoons/150 grams
unsalted butter, cut into pieces
3/4 cup plus 2 tablespoons/65 grams
sliced blanched almonds
1 1/4 cups/175 grams confectioners' sugar
4 large eggs, separated
pinch of salt
2 tablespoons granulated sugar
1 teaspoon vanilla extract
1/2 cup plus 2 tablespoons/80 grams
all-purpose flour

Butter and flour an 8 x 4-inch/20 x 10-cm loaf pan; set aside. Preheat the oven to 450°F/230°C.

Place the chocolate and butter in a double boiler or in a metal bowl placed just over a pan of simmering water. Whisk occasionally until melted and smooth. Meanwhile, grind the almonds with 1/2 cup/70 grams of the confectioners' sugar in a food processor. Whisk the egg yolks into the chocolate mixture. Then whisk the remaining 3/4 cup/105 grams confectioners' sugar, then the ground almond mixture. Remove this mixture from the heat and set aside.

Beat the egg whites with a pinch of salt until foamy. Add the granulated sugar and vanilla and beat until quite stiff but not dry. With a large rubber spatula, gently fold the egg whites into the chocolate mixture until not quite blended. Sift the flour over the mixture and fold together gently just until blended, no longer.

Pour the batter into the prepared pan and bake for 10 minutes (the top may crack slightly). Lower the heat to 375°F/190°C and bake until the cake has set but is still slightly wobbly, about 25 minutes longer. A toothpick inserted in the center will come out slightly damp. Cool on a wire rack for about 5 minutes.

Carefully run a knife blade around the edges of the pan and gently unmold the cake onto a wire rack. Cool to room temperature, then wrap in plastic and chill. Remove from the refrigerator about 10 minutes before cutting into slices. The Pleyel can be refrigerated for up to 2 days.

Serves 8 to 10.

Until we meet for coffee,

Julie

Tuesday, August 15, 2006

A Week in France


As I have previously written, there is certain comfort and solace to be found in the kitchen. Baking is solitary therapy. And there are few things more therapeutic than delicious French pastries. Paris Boulangerie Pâtisserieis a special cookbook featuring recipes from thirteen Parisian bakeries, and like all of Linda Dannenberg's books, it is filled with gorgeous color photographs and simple, but decadent recipes. Her books transport readers to beautiful locales, while introducing them to the true elegance and simplicity of classic French cuisine.

Last week, I took a brief break from The Suburban Apron Company, not to vacation or escape, but to catch up on several other projects that had recently lacked proper personal attention. Having somewhat caught up, there seems some time for brief escape. So, I've been traveling, via the written word, to Paris with Ms. Dannenberg, and oh, the places we've seen! And after much turn-page tourism, I decided to settle in today at Ladurée.

Financiers from Ladurée today, perhaps some chocolate desserts from La Maison du Chocolat by midweek, with even more sweet treats from Mulot at week's end...mmm...

Financiers
"Small Almond Cakes"
(recipe courtesy Paris Boulangerie Pâtisserie)

Ingredients:
5 tablespoons/75 g unsalted butter, cut into pieces
5 tablespoons sliced or slivered blanched almonds
1/3 cup/35 g confectioners' sugar, lightly packed
1/4 cup plus 1 tablespoon/35 g all-purpose flour
3 large egg whites
1/2 teaspoon vanilla extract

Melt the butter in a small saucepan over moderate heat until lightly golden, about 3 to 4 minutes. Watch carefully to avoid burning. Pour the butter into a medium bowl, leaving behind any sediment in the pan.
Grind the almonds, sugar, and flour in a food processor until powdery. Add the egg whites and vanilla and mix briefly until smooth. Add the browned butter, mixing until blended. Cover with plastic wrap and refrigerate the batter overnight.

Preheat the oven to 350°F/175°C. Stir the mixture briefly to deflate it. Generously butter 10 financier molds (small trapezoid shapes), or use 1 1/2 dozen small (1 3/4 inch/4-cm) muffin tins. Spoon the batter into the molds, dividing it evenly. Bake until golden, about 13 to 15 minutes for small muffin shapes, 15 to 20 minutes for larger financiers. Cool in the pan on a wire rack for about 5 minutes; then unmold and cool completely. Store airtight. Makes 10 financiers (or 16 to 18 small rounds).

As usual, I generously dusted mine with confectioners' sugar. Delicious.

Until we meet for coffee,
Julie

Friday, August 11, 2006

Five Questions for Christina Pirello


(photo courtesy www.christinacooks.com)


Chef Christina Pirello recently took time out from her very busy schedule to answer five questions for Paper Palate. To read my questions, along with her answers, and to find out what's new with cooking with whole foods and Chef Pirello, you can read the article, in its entirety, at Paper Palate on the Well Fed Network.

Until we meet for coffee,
Julie

Tuesday, August 8, 2006

A (Very) Brief Mini Break


I apologize for my less than frequent updates recently. I have been extremely busy with personal commitments and responsibilities. I will update again very soon--in a few days. Until then, spend some time at one of my longtime favorite online places...

Until we meet for coffee,
Julie

Friday, August 4, 2006

Five Questions for Mark Tafoya


Chef Mark Tafoya recently took time out from his extremely busy schedule to answer five questions for Paper Palate. To read my questions, along with his answers, and to find out what's new with Chef Tafoya, you can read the article, in its entirety, at Paper Palate on the Well Fed Network.

Until we meet for coffee,
Julie

Tuesday, August 1, 2006

Inside the Oven: A 19th Century (mini) Coffee Souffle


Charles Elmé Francatelli was born in England of Italian parents and studied cookery in France. While his work history included employment from various English nobleman, his most prestigious employment was that of chief cook for Queen Victoria. Having written numerous cooking books, many of which have been routinely reprinted and remain currently available.

My friend, Janet, who maintains The Old Foodie and the Companion to the Old Foodie, recently added a very intriguing collection of historic coffee recipes to her already large collection of historic recipes. While many of these coffee recipes may be primitive in method, none of them seemed impossible to attempt in the 21st century kitchen. And myself being quite the coffee fanatic, I decided that my first trip back into Janet's magical culinary history tour, would be an attempt of the recipe for Coffee Souffle, c.1867, from Charles Elmé Francatelli.

Until we meet for coffee,
Julie

Friday, July 28, 2006

Five Questions for The Hippy Gourmet


(photo courtesy www.hippygourmet.com)

Chef Bruce Brennan recently took the time to answer five questions for Paper Palate. To read my questions, along with his answers, and to find out what's new with The Hippy Gourmet, you can read the article, in its entirety, at Paper Palate on the Well Fed Network.

Until we meet for coffee,
Julie

Thursday, July 27, 2006

Sweet Snails, Sleeping


Sometimes sleep seems an impossible task. These are quiet times in the night, requiring quiet work to tire both mind and body into a readiness for slumber. Breadmaking by hand is quiet, busy work. As with insomnia, patience is needed. It was during last night's late night, while replying to emails and catching up with familiar websites, that I found this simple recipe, for Pain Aux Raisins and Cream Cheese Snails, from Floyd at The Fresh Loaf. So sweet and charming, I knew I simply had to bake these delightful little treasures as well.

The base is conveniently the same for these two recipes, both taken from The Village Baker , written by Joe Ortiz. While I prepared the base last night, the majority of this project actually took place early this morning. I cannot praise this dough enough. It works beautifully and I was more than pleased with my sweet little 'snails,' as they slept peacefully during their final rest, before being baked in the oven. Then, while still warm from the oven, I immediately sampled one of each. And, "Oh My!" It is nearly impossible to attempt a proper description. These lovely little pretties must be baked and tasted for oneself, in order to truly appreciate how delicious they really are.

Pain Au Lait
(recipe courtesy www.thefreshloaf.com)

Ingredients:
1 package (2 1/2 teaspoon) active dry yeast or 2 teaspoons instant yeast
3/4 cup water
3 1/2 cup all-purpose unbleached flour
1 1/2 teaspoons salt
2 Tablespoons powdered milk
4 tablespoons sugar
3 eggs
6 tablespoons butter, softened
If using active dry yeast, proof it in 1/2 cup of warm water for 10 minutes. (Alternately, instant yeast can be mixed in with the dry ingredients in the next step. )

In a large bowl combine the flour, salt, powdered milk, and sugar. Add the yeast, water, and eggs and mix until ingredients are combined. Add the softened butter and mix or knead until the ingredients are thoroughly combined. You should have a fairly sticky, satiny dough.

Place the dough in a greased bowl, cover with plastic wrap, and allow the dough to rise until doubled in size (approximately 1 to 1 1/2 hours). Punch the dough down, return it to the bowl and cover it again, and place it in the refrigerator overnight.

In the morning, divide the dough in half and, while still cold, use each half to prepare one batch (8) of each type of snails (or two batches (16) of one).

Before beginning, you'll need to make a simple egg glaze that you will use in both recipes:
1 egg
1 tablespoon milk
Whisk to combine.
Cream Cheese Snails
(recipe courtesy http://www.thefreshloaf.com)

Ingredients for Filling:
3/4 cup cream cheese
2 tablespoons sugar
1/2 teaspoon vanilla extract
1 tablespoon egg glaze

Roll the dough out into a large rectangle, approximately 8 by 12 inches. Slice the rectangle into 8 long strips.

Stretch each strip as long and thin as you can (Ortiz suggests 24 inches). Twist each strip and then curl each up to make a snail shape.
Place the snails on a parchment-lined or well greased baking sheet and brush them gently with the egg glaze. Use your fingers to create a well in the center of the snail and then place one tablespoon of the cheese mixture/filling on top.
Let the snails rise for 1 to 1 1/4 hours until they are puffy. Preheat the oven to 385 degrees and bake the snails for between 15 to 17 minutes, until they are golden brown. Makes 8 snails.

Immediately after removing from the oven, paint then with a light sugar glaze:

1/4 cup water
1/4 cup sugar
1/8 teaspoon vanilla extract
Pain Aux Raisins
(recipe courtesy http://www.thefreshloaf.com)

Ingredients for Filling:
1/4 cup sugar
1/2 teaspoon cinnamon
1/3 cup raisins

Roll the dough out into a large rectangle, approximately 8 by 10 inches. Coat the rectangle with the egg glaze and then spread the cinnamon, raisin, and sugar mixture/filling over it.

Roll the the dough up into a large log and then slice it into 8 pieces. Place each of the pieces onto a parchment-lined or well greased baking sheet, press down on them with the palm of your hand to flatten them, and then paint them gently with the egg glaze.

Let the snails rise for 45 minutes to 1 hour until they are puffy. Preheat the oven to 385 degrees and bake the snails for between 15 to 17 minutes, until they are golden brown. Makes 8 snails.
Immediately after removing from the oven, paint then with the same sugar glaze you painted the cream cheese snails with above.
Until we meet for coffee,
Julie

Monday, July 24, 2006

Charcoal and Cannoli


In a recent post, I revisited younger days of peak personal creativity; days where art, poetry and much tea prevailed. Later days followed with continued creativity, although accompanied not by tea, but by coffee instead. It was during these years of so much written and visual creation that my love affair with coffee was renewed. Espresso filled days of sketching and painting, and days spent striving to be clever over steaming cups of cappuccino. This is when I was still listening, incessantly, to the distinctive and divine genius of Michael Hedges. So many days of personal creation when pencil and charcoal also made distinctive noise, when pulled across heavy paper.

These days, my creativity occurs mostly in the kitchen. And just as charcoal has a distinctive feel when held between fingers creating, thick, sweet dough also has a distinctive feel between fingers baking. Without a pasta roller, working with cannoli dough demands a certain patience. But finally, the dough is ready, then cut, molded, and fried. The results more than reward the effort. A truly happy calm comes from delicious homemade cannoli. Homemade mocha cannoli creates near euphoria.


Mocha Cannoli
(recipe courtesy The Ultimate Espresso Machine Cookbook, Tom Lacalamita)

Ingredients: 
For the Cannoli Shells:
4 teaspoons sugar
4 teaspoons vegetable shortening
1 large egg, beaten
2 tablespoons white white vinegar
2 1/2 tablespoons water
2 teaspoons honey
1 teaspoon ground cinnamon
1 1/2 cups unbleached all-purpose flour, or more as needed
(I added a little unsweetened cocoa also).

For the Mocha Cannoli Cream:
2 cups whole-milk ricotta
1/4 cup granulated sugar (I substituted confectioners sugar)
2 tablespoons Espresso Concentrate (I substituted Espresso Coleur)
3 tablespoons mini semisweet chocolate chips (I substituted regular sized chips)

To finish the Dessert:
Vegetable oil for frying
Confectioners sugar for sprinkling
(I also dusted with unsweetened cocoa powder.)

Prepare the cannoli dough: In a large mixing bowl, cream together the sugar and shortening, using an electric mixer. Mix in half of the beaten egg (approximately 2 tablespoons, reserving the remainder), vinegar, water, honey, and cinnamon. Gradually add the flour and mix until a stiff dough is formed. Add more flour if necessary. Form the dough into a flat circle. Wrap in plastic wrap and chill in the refrigerator at least 2 hours or overnight.

Prepare the cannoli cream: Place the ricotta in a large strainer lined with cheesecloth or a sheet of paper towel. Place over a large bowl, cover, and refrigerate overnight to drain.

In a large mixing bowl, combine the drained ricotta, sugar, and espresso concentrate. Beat on high with an electric mixer until smooth and creamy. Fold in the chocolate chips. Cover and chill in the refrigerator at least 2 hours or overnight.

Prepare the cannoli shells: When the dough has chilled sufficiently, gently roll it out on a lightly floured work surface until it is slightly less than 1/8-inch thick. You can also roll the dough out using a hand-cranked pasta maker as follows: Cut the dough into 4 equal pieces and shape into balls. Flatten each ball with the palm of your hand and sprinkle lightly with flour. Roll the dough through the pasta maker on the highest setting. Reinsert the dough and roll through the next succeedingly lower settings until the dough is 1/8-inch thick. Once the dough is rolled out, cut out as many 4-inch circles as possible. You should wind up with 18 to 20 circles.
Lightly grease the cannoli tubes with vegetable oil or shortening. With the rolling pin, gently flatten each 4-inch circle of dough, in one direction only, so that it becomes oval (the oval should be slightly shorter than the cannoli tube). Wrap the dough oval around the cannoli tube. Lightly brush one edge with reserved beaten egg to seal. Do not get egg on the tube or it will stick to the pastry. Continue until all the tubes are wrapped with the dough.

Fry the cannoli shells: Heat 1 inch of vegetable oil in a medium-size, deep skillet to approximately 350°F. Fry the cannoli, two at a time, until lightly golden, about 6 to 8 minutes. Remove from the oil and drain on paper towels. While still warm, gently slide out the cannoli tube and repeat the process until all the shells are fried and the remaining dough has been used.

Fill the cannoli shells: When the shells are cooled and you are ready to serve, remove the filling from the refrigerator. Fill the shells by using either a teaspoon or a pastry bag fitted with a 3/4-inch plain, round tip. Dust with confectioners sugar. Cannoli shells can be prepared and stored in an airtight container for up to 1 week before filling. If you like to plan very far in advance, you can store the unfilled shells in the freezer for up to 30 days.

Yields approximately 18 cannoli.

Until we meet for coffee,
Julie

Friday, July 21, 2006

Martha's Jelly Roll


I recently reviewed Martha Stewart's recipe for a classic summer dessert: the Jelly Roll (included in the July issue of Martha Stewart Living). This simple dessert is well suited for either a mid-Summer brunch or an afternoon service of coffee or tea. When served slightly chilled, the almond flavor of the cake combined with the sweet, fruity jam makes this dessert a refreshing finish to any meal. To read the recipe in its entirety, visit Paper Palate on the Well Fed Network.

Until we meet for coffee,
Julie

Wednesday, July 19, 2006

Five Questions for Lidia Bastianich


Chef Lidia Bastianich recently took time out from her very busy schedule to answer five questions for Paper Palate. To read my questions, along with her answers, and to find out what's new with Chef Bastianich, you can read the article, in its entirety, at Paper Palate on the Well Fed Network.

Until we meet for coffee,
Julie

Tuesday, July 18, 2006

A Time for Tea and Remembrance...


a unique cake, that is not oven-baked, but rather quietly and peacefully steamed...

Steamed Green Tea Cake
(recipe courtesy www.allrecipes.com)

Ingredients:
1 1/2 cups cake flour
1/2 teaspoon baking powder
2 teaspoons powdered green tea (Matcha)
(I simply used finely ground loose green tea leaves,
further ground in food processor.)
6 egg yolks
1 1/4 cups white sugar
2 1/2 tablespoons water
1 1/2 teaspoons vanilla extract
6 egg whites
2 teaspoons black sesame seeds, garnish (I omitted these.)

Set a bamboo steamer large enough to contain a 9x9 inch pan over simmering water. Sift together the cake flour, baking powder and green tea powder. Set aside. In a large bowl, combine the egg yolks, sugar, water and vanilla extract. Using an electric mixer, beat on medium speed until mixture has tripled in volume. Fold in the flour mixture, mixing just until combined. Beat the egg whites until they form stiff peaks. Gently fold whites into the egg yolk mixture. Pour batter into the cake pan. Place cake pan in steamer. Stretch a kitchen towel over the cake pan without touching the surface, then cover with steamer lid. Steam cake for 20 minutes, or until a toothpick inserted in the center comes out clean. Cool on wire rack. Sprinkle with black sesame seeds and cut into pieces before serving. Yields 12 servings. (However, I made two smaller 4-inch individual cakes, as opposed to one large single cake. And I also dusted the tops with confectioners sugar.)

(Each week at Sweetnicks, there is a weekly round-up of healthy contributions from various food bloggers, promoting the use of antioxidant rich foods in home cooking; since green tea is extremely rich in antioxidants, this Steamed Green Tea Cake will be my offering, in remembrance of Michael Hedges, nearly 10 years after his passing, to this week's ARF/5-A-Day plate.)

Far more than ten years have now passed, since I was living in the midst of a somewhat personal bohemian renaissance. I was sketching and painting, attempting (in vain) to read nearly every word ever written, and myself writing depressing, but philosophical poetry for what was then known to be independent journals and introspective zines. It was during this time of constant creativity, during those early days of bongos and birks, incense and candles, and eating, "nothing with a face," that I discovered the amazing, mesmerizing, and distinctive beauty of Michael Hedges. To hear his music, or better still, to see his music (many of his performances are available on vhs/dvd), is to witness a talent so incredibly impressive and awe-inspiring, that it renders any articulate description impossible.

Much time and many more personal revolutions have passed, since those earlier years, when it was more about what I didn't eat, as opposed to what I did. When so many ambitious, yet naive creative endeavors were pursued, while drinking seemingly endless cups of tea. (These were considerably younger days, when I actually took more tea than coffee...believe it or not, Janet). And while I very rarely eat tofu anymore, and nowdays, I eat nearly everything with a face, my admiration for the music of Michael Hedges remains, stronger than ever.

Sadly, in 1997, Michael Hedges was killed in an automobile accident, shortly after the Thanksgiving holiday. Despite his sudden departure, his legacy remains, stronger than ever.

Until we meet for tea,
Julie

Popout

Monday, July 17, 2006

So Good, I Have to Share...


ReMARKable Palate is a truly extraordinary blogsite from Chef Mark Tafoya, a Certified Personal Chef in New York City and the Executive Chef for The Gilded Fork, the stylish online culinary magazine that produces The Culinary Podcast Network. These are also must visit links, trust me! With well written blog entries that correspond to eclectic podcasts that are both highly informative and extremely entertaining, Chef Mark'sReMARKable Palate is, well, remarkable. In addition to Chef Mark's well written and well spoken words, his site also contains much helpful information and many useful resources, including ideas for dinner menus, recipes, tips for proper food handling and storage, and some really cool links, as well. If you're not already listening to (and reading) Chef Mark, you simply must visit his site! You'll be more than happy with time spent with Chef Mark at ReMARKable Palate.

Until we meet for coffee,
Julie

Friday, July 14, 2006

A Friday "Pick-me-up" for My Favorite Domestic Goddess...


Recently, I was both intrigued and inspired by Ivonne's strawberry tiramisu at Cream Puffs in Venice. And since, I also always bake my own ladyfingers, use homemade whipped cream, and real mascarpone cheese in my desserts (and yes, mascarpone cheese can be homemade from cream cheese and heavy cream, although I often buy it), I agree with her sentiments, regarding the ubiquitous, manufactured versions of this wonderful dessert: it's enough to make you turn away, disheartened. But who can remain cross with such a delicious dessert as this?

Autumn, my favorite domestic goddess, lives two thousand miles away from me. We are first cousins, but grew up like sisters. Despite the distance, for months, Autumn has wanted me to make tiramisu for The Suburban Apron Company. Motivated by Ivonne's strawberry tiramisu, and also because Autumn mentioned it again, a few days ago in a telephone conversation, I made her a chocalate tiramisu, recipe courtesy Ghirardelli (her favorite brand of chocolate).

As with many luscious desserts, the history of tiramisu is typically vague, having varied sources of alleged origin. Anna Maria Volpi provides an excellent geneaology of tiramisu on her site, A Passion for Cooking. One primary point of agreement is the literal translation of the name, tiramisu, which is defined as, "pick-me-up," in Italian. So, here's a Friday "pick-me-up" for Autumn, and for all of you who have kindly stopped by The Suburban Apron Company.


Ghirardelli Tiramisu
(recipe courtesy www.ghirardelli.com)

Ingredients:

1/2 cup(s) Sweet Ground Chocolate and Cocoa
1/2 teaspoon(s) Sweet Ground Chocolate and Cocoa
1/3 cup(s) confectioners' sugar
1/2 cup(s) coffee-flavored liqueur (see personal substitution)
1 1/2 teaspoon(s) pure vanilla extract
1/2 teaspoon(s) salt (optional)
1 1/2 cup(s) heavy whipping cream
2 tablespoon(s) water 2 teaspoon(s) powdered instant espresso coffee
(or use coarsely ground espresso beans and vanilla extract, as I did)
6 ounce(s) ladyfingers, halved (about 2 dozen)
(or double if using unsplit, homemade ladyfingers)
12 ounce(s) mascarpone cheese

In a large mixing bowl, beat the mascarpone, 6 tablespoons of the ground chocolate, 1/4 cup of the confectioners’ sugar, 1/4 cup of the liqueur, 1 teaspoon of the vanilla extract, and the salt with a wire whisk. Set aside. In a small bowl beat 1 cup of the whipping cream until stiff peaks form. Fold the whipped cream into the mascarpone mixture. In another small bowl, combine the remaining 1/4 cup liqueur, the remaining 1/2 teaspoon of vanilla extract, the water, and the espresso powder. Line a 2 1/2-quart glass or crystal bowl with one fourth of the ladyfingers; brush with 2 tablespoons of the espresso mixture. Spoon one third of the mascarpone mixture over the ladyfingers. Repeat, making 2 more layers of ladyfingers brushed with the espresso mixture and topped with the mascarpone mixture. Top with the remaining ladyfingers, gently pressing them into the cheese mixture. Brush the ladyfingers with the remaining espresso mixture. Sprinkle 1 tablespoon of ground chocolate over the top. In a small mixing bowl, beat the remaining 1/2 cup whipping cream and the remaining confectioners’ sugar until stiff peaks form. Spoon the whipped cream into a decorating bag with a large star-shaped tip. Pipe large rosettes on top of the dessert. Sprinkle the remaining 2 tablespoons of ground chocolate on the rosettes. Chill at least 2 hours. Yields 15 servings.

(If you cannot find mascarpone cheese, substitute 16 ounces of softened cream cheese and 3 tablespoons of milk. Beat on medium until smooth and fluffy. Add 6 tablespoons of the ground chocolate, 1/2 cup confectioners’ sugar, 3 tablespoons coffee-flavored liqueur, 1 teaspoon pure vanilla extract, and omit the salt; set aside. Continue as the recipe directs.)

For the coffee-flavored liqueur, I substituted Chef Markus Farbinger's Espresso Couleur, (recipe courtesy Baking with Julia):

1 cup sugar, 1/2 cup hot brewed espresso

Place a wide straight-sided heavy sauté pan (a chicken fyer with high sides would be ideal) over medium heat. When the pan is hot, sprinkle a little sugar into the pan. As soon as some of the sugar melts, sprinkle more sugar over it. (You are going to caramelize the sugar spot by spot.) When half of the sugar has been added, start stirring the sugar with a wooden spoon and adding the remainder of the sugar about 1 tablespoon at a time. Again, you don't want to add more sugar than the caramel can absorb--you're still working spot by spot.

Keep cooking the caramel until it's darker than you ever thought caramel should be. The sugar will smoke--lots; be really, really dark--really; and look foamy. When the sugar bubbles, remove the pan from the heat. Stand away from the pan and add a little of the hot espresso. Keep adding the espresso little by little and stirring it into the sugar. (If the espresso is too cold or you add it too quickly, the sugar will seize and you'll have lumps, a problem that's not irreparable--you can melt the lumps--but is avoidable.) When all of the espresso has been incorporated, turn up the heat and bring the mixture back to the boil.

Place a metal spoon in a heatproof canning jar, pour the extract into the jar, allow to cool, then cover. When it cools, its consistency will be syrupy. You can make the couleur up to two months ahead and keep it in a cool place.

Until we meet for coffee,
Julie

Sunday, July 2, 2006

Yummy Homemade S'Mores!


Yes, homemade s'mores! Recipe courtesy of Martha Stewart, as it seems that so many of my favorite good things come from her recipe collections. So, for my special Fourth of July recipe review at Paper Palate and theWell Fed Network, I made homemade graham cracker cookies, homemade chocolate bars, and yes, even homemade marshmallows (those really cool square ones) to create melt-in-your-mouth-mess-up-your-face-more-delicious-than-words-can-describe s'mores. To read the recipe in its entirety, visit my July 4th weekend article atPaper Palate.

Until we meet for coffee,
Julie

Friday, June 30, 2006

Broccoli and Voltaire


A couple of months ago, one of my posts on The Suburban Apron Companywas devoted to starting a tiny, little garden (which my husband diligently waters for me each day). Despite some initial procrastination in planting this garden, it is happy and prosperous. And despite my personal reluctance in tending to my own spiritual garden, exercises in personal cultivation have also become more prosperous. While my faith has never faltered, my spirit was severely wounded from my father's death last year. Work became a place of refuge, and then a place of agony. Once I left work, I became even less steady, but still productive, assuming the role of a modern-retro housewife. Since then, my productivity has become exponential, simultaneously taking me in several different directions. The Suburban Apron Company successfully chronicles much of my culinary adventure, while writing for Paper Palate and the Well Fed Network has allowed me to rekindle my former romance with writing professionally. Still, the activity hadn't afforded me the means to achieve any consistent inner peace. However, I've continued to tend my spiritual garden. And recently, I've discovered new opportunities to volunteer my talents for service within my local community. Helping myself by helping others.

To sow and to reap the fruits of our labors...

In honor of so much cultivation, I baked these delightfully simple Crustless Broccoli-Cheddar Quiches from Martha Stewart, with broccoli gathered fresh from our miniature plot of suburban farmland. The subtle flavor of the nutmeg (of which I added a little extra, of course...) was the perfect compliment to this creamy, cheesy quiche with broccoli that tasted much sweeter than any store-bought variety. My spirit has been strengthened to continue tending my garden, cultivating good fruits.

(Each week at Sweetnicks, there is a weekly round-up of healthy contributions from various food bloggers, promoting the use of antioxidant rich foods in home cooking. Broccoli is a well known antioxidant, containing many powerful vitamins and nutrients. Therefore, these savory broccoli-cheddar quiches will be my side-dish for this week's ARF/5-A-Day plate over at Sweetnicks.)


Crustless Broccoli-Cheddar Quiches
(recipe courtesy Martha Stewart Living)
Ingredients:
Butter, for ramekins
Coarse salt
1 package (10 ounces) frozen broccoli florets
(or use fresh broccoli from your garden, as I did)
6 large eggs
1/2 cup half-and-half (or use a little heavy cream, as I did)
Ground pepper
1/8 teaspoon ground nutmeg
3/4 cup shredded cheddar cheese (3 ounces)


Preheat oven to 350°. Butter four 8-ounce ramekins (or a 9-inch pie dish); set aside. Bring a medium pot of salted water to a boil. Add broccoli; cook 1 minute. Drain well; transfer to a cutting board, and blot dry with paper towels. Chop coarsely.

In a large bowl, whisk together eggs, half-and-half, 1/2 teaspoon salt, 1/4 teaspoon pepper, and nutmeg. Stir in broccoli and cheese.

Place ramekins on a rimmed baking sheet. Ladle broccoli mixture into ramekins, dividing evenly. Bake until golden brown, 35 to 40 minutes. Serve with crusty bread and a mixed-green salad, if desired. (I served with toasted homemade thyme-flavored bread.) Serves 4.